
How to setup the Avid BB7
Common issues
There are a couple of common issues with the BB7 that crop up in many of the forums, many of them due to not taking care with the setup of them.
One of the most common complaints is of a spongy feel. This is most certainly down to the type of cable and routing being used. At the very least you absolutely MUST use compressionless cable housing, and make sure that you run it full length to the brakes themselves. Do not use sections of cable with interruptions (with one exception which I will mention in a moment) as you may do for rim brakes. The cable housing must run full length from the brake lever to the brake caliper. Interruptions to the cable routing cause friction where the cable enters a new section of housing, as well as risking dirt and moisture getting into the routing. Over time (or even one muddy ride) this will of course make the brakes feel pretty rubbish.
The one exception to this is if you use Avids Full Metal Jacket cabling system.
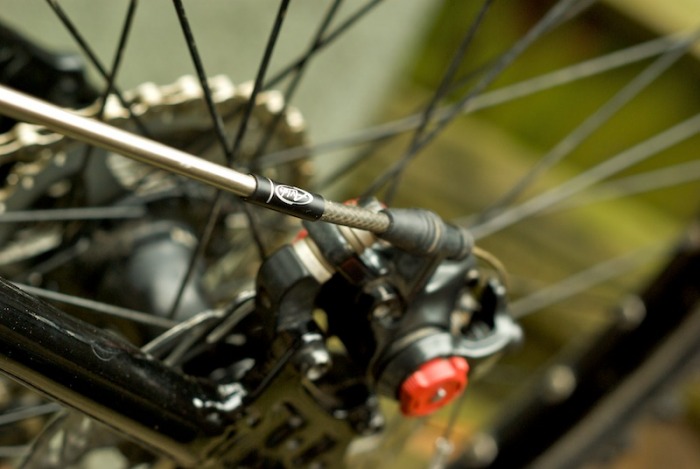
The Full Metal Jacket system
The Avid Full Metal Jacket system uses cable interruptions to its advantage by filling the housing gaps with metal tubing. At either end of the metal tubing there are low friction connectors to minimise any drag on the cabling.
The whole system is totally insulated from the effects of mud and dirt, so installed properly you should never suffer from 'gritty' feeling brakes again. In fact because friction is reduced to a minimum with this system the Avid BB7's not only have the power of hydros, but they also feel like them as well!
While it is not essential to have the Full Metal Jacket system for your BB7's I would highly recommend it. But as long as you do not skimp on the quality of your cabling you should be fine, although preferably you should be aiming for a weather sealed system of some kind. I would also recommend the Avid Flakjacket set.
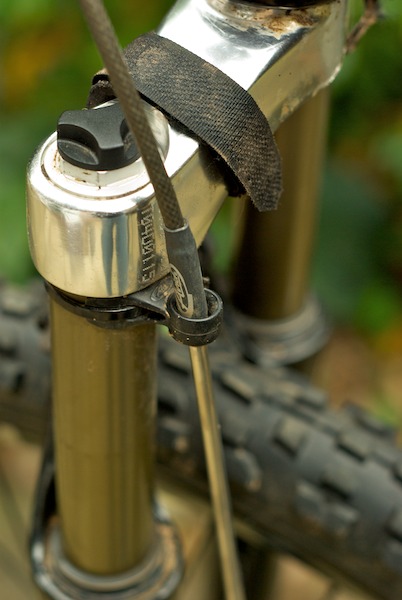
Brake levers
Brake levers are also very important. The Avid BB7's were designed to be used with their own Speed Dial levers. People have successfully used BB7's with Shimano XT levers as well, although personally I love the amount of adjustment that the Speed Dials offer. In fact it can be essential to getting the best performance out of the BB7 disc brakes.
Cable Finishing
In addition to the quality of your cable system you should also make sure that you do not rush the finishing of your cable housing ends. Many people will just cut the cable to length and install it. Remember that any point at which the cable has to enter or exit cable housing is a potential point of friction, and hence a reduction in braking performance.
As a result you must make sure that you finish the cable housing ends and file them down so that they are smooth and free from any burrs. As well as this, please make sure that you use a good pair of cable cutters such as the ones from Park Tool.
Quite often it is the simple things like this that make a difference.
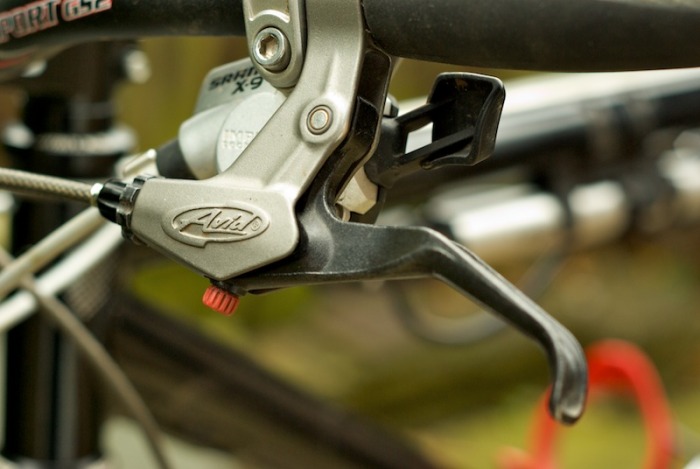
Modulation
This is another of the common topics brought up on cycle forums. Contrary to what some will say, the Avid BB7's can be made to modulate just as well as hydros. But only if you use the Avid Speed Dial levers. The Speed Dials not only have a reach adjustment, but they also have a modulation adjustment dial (what Avid term "Speed Dial"). Turn this fully counter clockwise and you will have a finely modulated mechanical disc brake that matches many good hydros.
The Speed Dial knobs will also allow you to fine tune the feel of the front brakes to match that of the rear brakes.
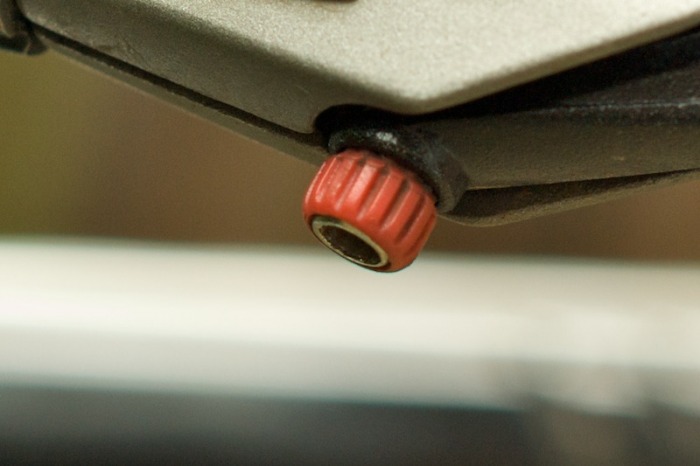
Setting up the pad distance on the Avid BB7
Setting up the pad distance is very important and will go a long way to getting the right feel. I went through many different suggestions on forums as to how to set up the pad distance, but eventually I stumbled upon this method, which I have to say is by far the best.
Firstly you need to make sure that the caliper is centred. To do this loosen off the caliper bolts enough so that the caliper can move about. Loosen off the cable bolt too and make sure that the cable tension adjustment on the brake lever is all the way in.
According to the Avid instructions there should be approximately twice as much gap from the inside pad to the rotor on the as there should be on the outer pad. However in practice this doesn't always give the best performance.
Use the pad adjustment knobs to back out the pads all the way. Now turn the inner pad adjuster all the way in as far as it will go (though don't force it). Then back out again by 10 clicks.
Now turn the outer adjuster in until the caliper is locked against the brake disc. Tighten the caliper mounting bolts. The caliper will now be centred properly. If you have Avid Speed Dial levers you should now adjust the brake lever reach (always do this BEFORE you tighten the cable pinch bolt on the caliper). Now pull the cable tight and secure it with the cable pinch bolt. Now back out both the pad adjustment knobs all the way.
Pull on the brake lever to make sure that there is no slack. There should be no play at all in the lever. As soon as you start to pull there should be movement on the caliper arm. If there is play then you will need to pull the cable through a bit more and re-tighten it. You shouldn't need to use the tension adjustment on the lever itself.
Now turn the inner pad adjuster inwards 4 clicks and pull the lever a couple of times and spin the wheel. Keep repeating this until you can hear rubbing on the disc. Now back out the adjuster one click at a time until no rubbing can be heard. Then back out by another two clicks for clearance (though some people prefer to leave only one click distance).
Now repeat those steps for the outside pad adjuster.
Solving other potential issues

If this is your first time using disc brakes you will need to be aware that they need to be bedded in. This goes for all disc brakes, both hydros and mechanical. So you may not obtain full power until you have been on a number of rides. This is actually one reason why many people are initially disappointed with their new disc brakes as they think that there is no power.
The best way to bed in disc brakes is to ride normally. Some people advise to perform several hard braking stops, but this can be counter productive as it is possible that the pads may become glazed over. This will be no good for braking power or noise! so the best advise is to ride normally and avoid any really sloppy muddy conditions until you have bedded them in and obtained full power.
Squealing is another issue that afflicts disc brakes of all types. It can often be hard to track down the exact cause. Most often disc brakes will howl in wet conditions. The BB7's in particular may make a noise for a while until they have bedded in. Although there could be other causes such as fork flex or another component that is vibrating under braking. It isn't always the disc brake that is making the noise.
It is also worth noting that sintered pads will cause more noise than organic pads. However organic pads, while offering much better performance than sintered ones will wear out much more quickly.
Help is at hand though through an innovative company called www.discobrakes.com who make some amazing 3xlife organic pads that contain ceramic compound as well for added heat dissipation. They come highly recommended!

This site is not endorsed or affiliated with SRAM in any way or form.
